How Can We Help?
Customize Exhibit SettingsCustomize Exhibit Settings
This page describes how you can edit settings for a DCX exhibit once you have created one. To first create an exhibit, please see Create a Standard Exhibit.
![]()
Whenever you are finished configuring the settings below, scroll to the bottom of the page and choose Save Draft or, if ready to publish changes, expand the save menu and select Publish.
Customize Title and Banner
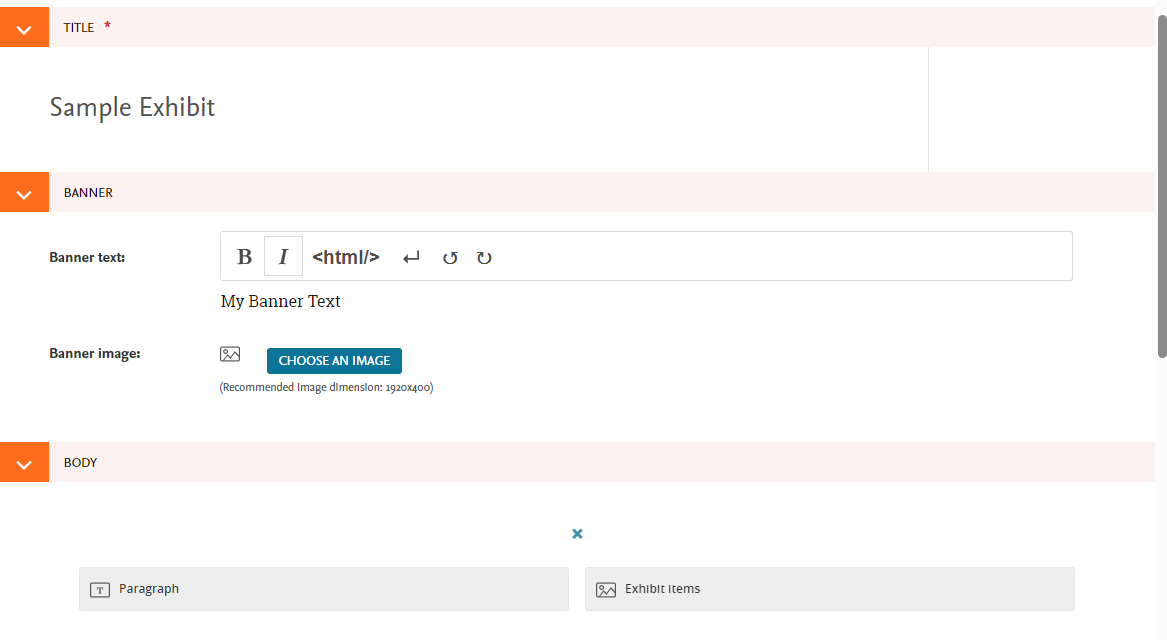
If your exhibit does not yet have a title, enter an exhibit Title (required) on the exhibit edit page. The title will be populated already if you created the exhibit while importing content from Digital Commons.
You may also add banner text and a banner image, if you haven't already done so:
- Add Banner text using the text formatting tools, including line breaks using the carriage return arrow.
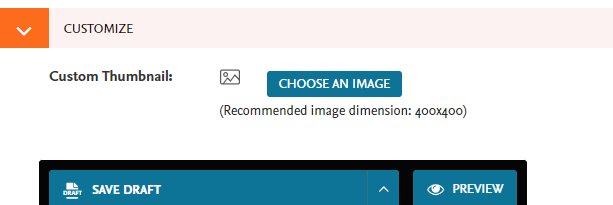
- Select Choose an Image to upload a Banner image. Recommended dimensions are 1920 x 400 pixels. If you don't choose a banner, the default site banner will be used for the exhibit (see Customize Your DCX Site for more about the default site banner). The banner image you upload here will also be used for the exhibit thumbnail on the site landing page. You can choose a custom thumbnail by scrolling down the edit page to the Custom Thumbnail section and selecting Choose an Image.
Add Descriptive Text and Other Exhibit Page Content
You may add descriptive text, links, attachments, images, or embedded content to accompany your exhibit. This is configured using a Paragraph block that displays on the exhibit page.
Scroll down to the Body section and select the Paragraph option. If a Paragraph option doesn't appear, click the plus + symbol, then select the Paragraph option.

A paragraph block will appear with tools to add text, images, and any other elements that you would like to include in the exhibit description.

Image options: Select the ![]() image icon to embed an image and control its layout on the page. See Upload or Search for Images in DCX, if needed, for more details.
image icon to embed an image and control its layout on the page. See Upload or Search for Images in DCX, if needed, for more details.
Embed tool options: The ![]() embed tool supports oEmbed and Embed.ly, which allow you to easily embed items from third-party providers such as YouTube, Vimeo, Kaltura, SoundCloud, TimelineJS, StoryMapJS, Google My Maps, SketchFab, and more. To embed content from providers not supported by oEmbed or Embed.ly, you may add embed code using the html formatting option (<html/>).
embed tool supports oEmbed and Embed.ly, which allow you to easily embed items from third-party providers such as YouTube, Vimeo, Kaltura, SoundCloud, TimelineJS, StoryMapJS, Google My Maps, SketchFab, and more. To embed content from providers not supported by oEmbed or Embed.ly, you may add embed code using the html formatting option (<html/>).
When done adding descriptive text, you can proceed with the additional options on the exhibit edit page, described below. Or, if finished, you can scroll down to the bottom of the edit page and choose Save Draft, or expand the menu and choose Publish if you’re ready to display changes on the live site.
Set an Exhibit as a Featured Collection
The “Featured” option controls which exhibits, if any, appear at the top of the site landing page in a Featured Exhibits section. If you’d like to feature an exhibit, select the Featured checkbox on the exhibit edit page.

When done, choose Save Draft at the bottom of the page, or expand the menu and choose Publish if you’re ready to display changes on the live site.
Customize Which Metadata Fields Display
After you have imported items to an exhibit, you will have the option to select the metadata fields that will display on item pages.
A list of metadata fields that were captured for imported items will display in the Customize Metadata section along with checkboxes to select or deselect fields. The Customize Metadata area of the exhibit edit page will be blank until content has been imported into the exhibit.
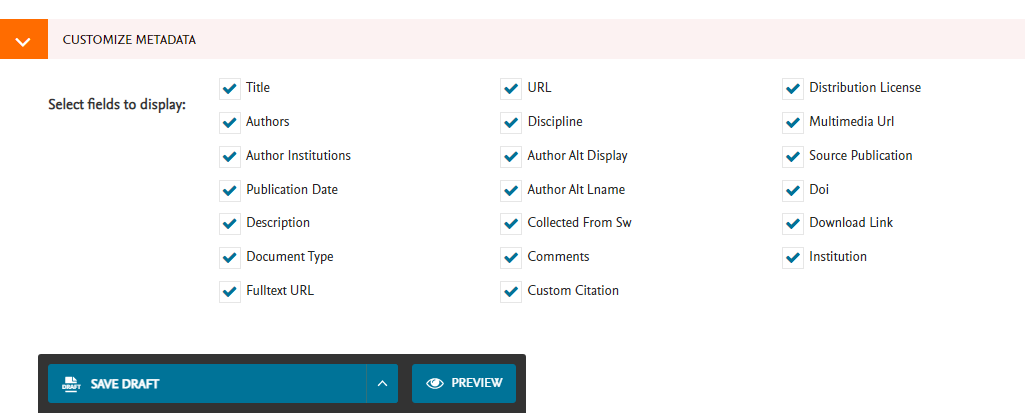
When you import content, all available metadata fields are pulled over from the DC publication structure. If importing from multiple DC structures, the list will include the metadata fields from all of those publications.
Available metadata fields are based on the fields exposed in the Digital Commons API, which comprises most DC metadata fields including custom fields. Please ask your consultant if you would like more information about specific fields.
Deselect any fields that you do not want to include on item pages. Scroll down and choose Save Draft when done or, if ready to publish changes, expand the save menu and select Publish.
TIP: Deselecting all fields removes the metadata section from item pages in the exhibit. This may be helpful if you’d like a more flexible page layout for any additional text, images, or embeds you wish to include using the editor tools for each item page (see Customize DCX Item Pages and Thumbnails).
Choose a Custom Thumbnail for an Exhibit
You can choose a custom image to display as the exhibit thumbnail on the site landing page. At the bottom of the exhibit edit page, click Choose an Image to upload an image or select one already uploaded to the site.
Control Font, Colors, and Privacy
Click the Settings tab if you wish to change the font, font color, or background color of your exhibit. In addition, you can control the privacy status for the exhibit if you’d like to hide or unhide the exhibit from public view.
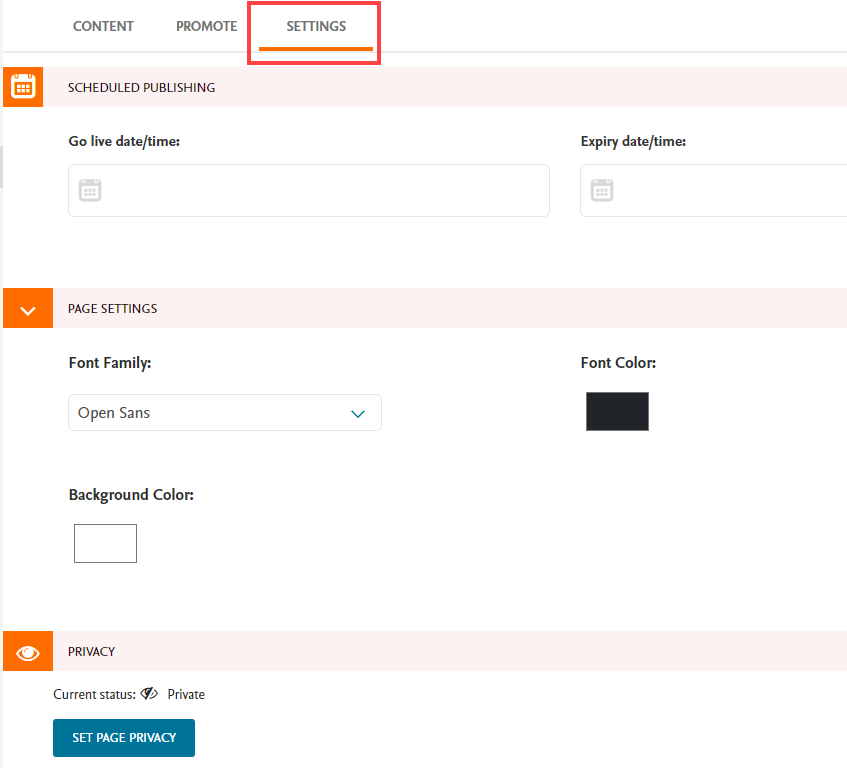
The visibility status appears under “Privacy.” Click Set Page Privacy to open a window where you can change the visibility, if desired.
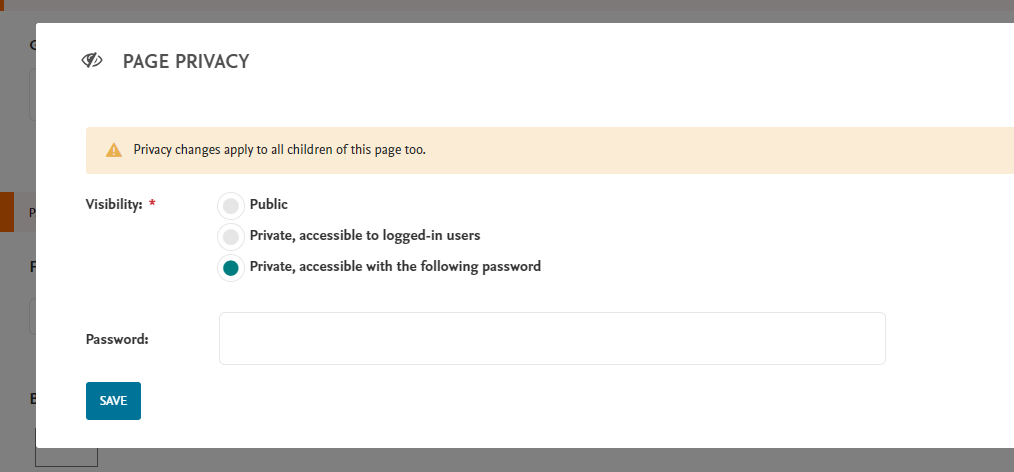
Choosing either of the “Private” options for the exhibit will make all items within the exhibit private. If you prefer to only hide specific items within the exhibit, you can choose the “Public” setting for the exhibit and then change privacy settings at the item level.
A message will display instead of the above if the site level has already been set to private, in which case the exhibit inherits the site’s privacy setting.
Click Save Draft or expand the menu and select Publish once you’ve finished configuring options.
 Digital Commons Help Center