 Digital Commons Help Center
How Can We Help?
Customize Your DCX SiteCustomize Your DCX Site
Add Site Branding
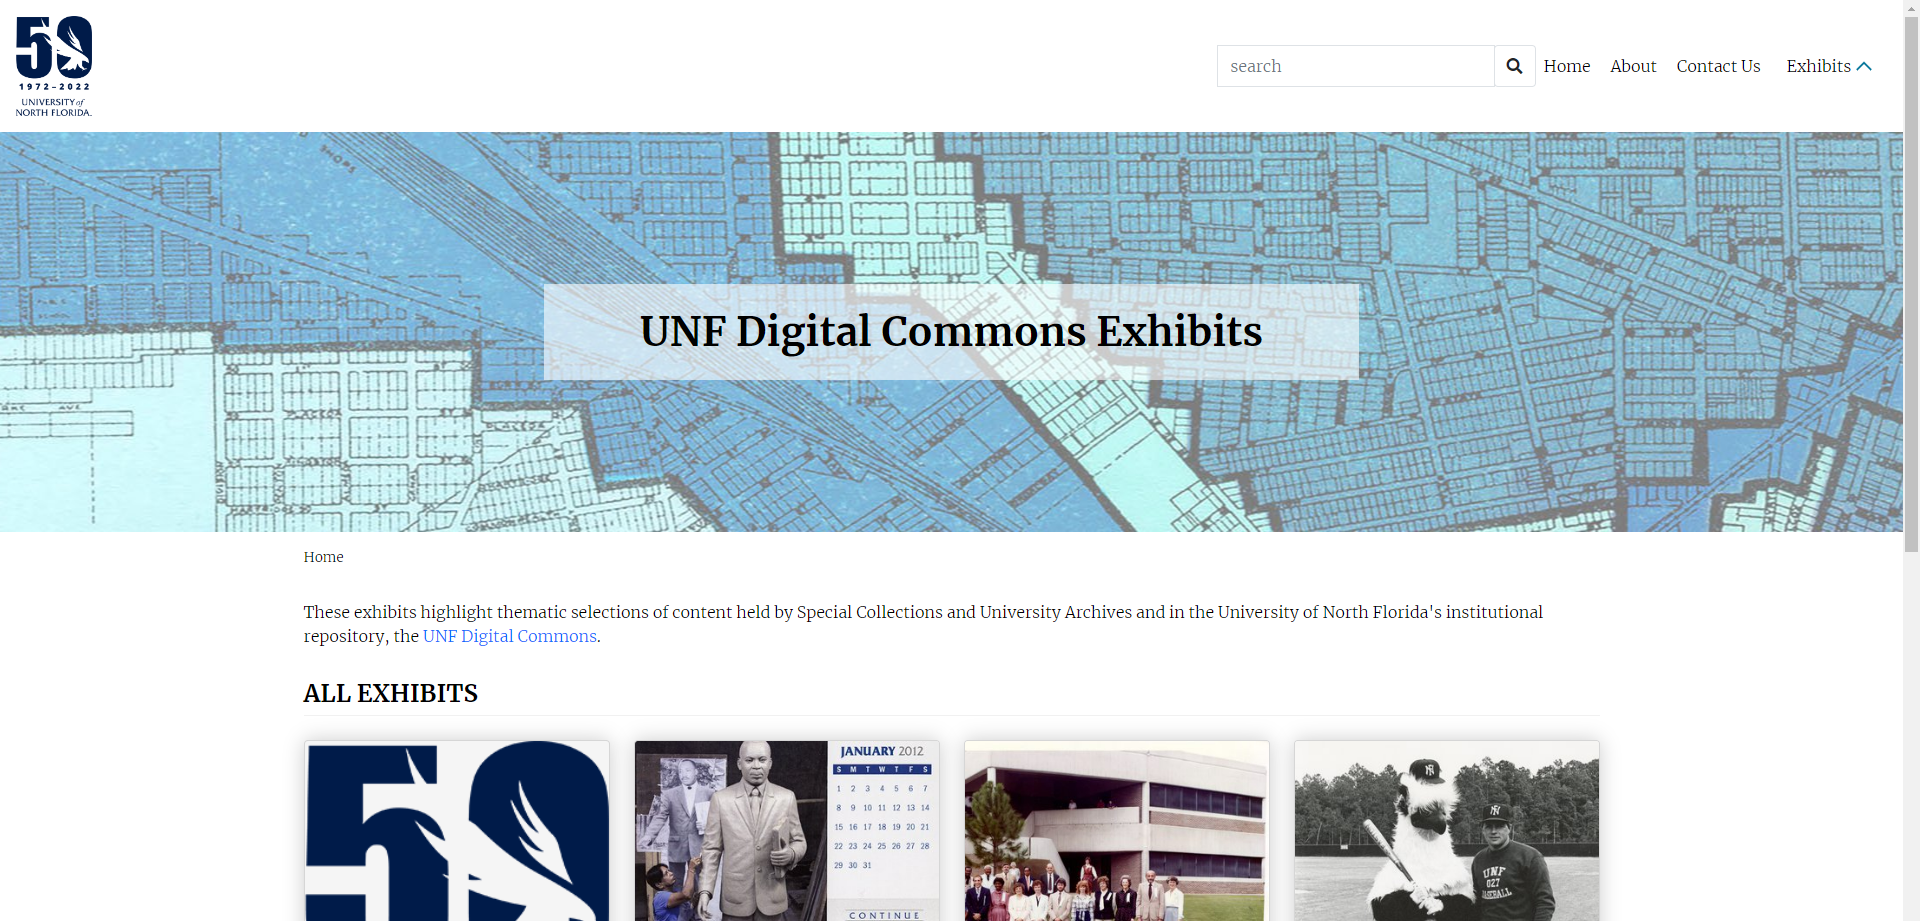
You can add a site logo, shown in the upper left, as well as a full-width banner.
To add your logo and banner:
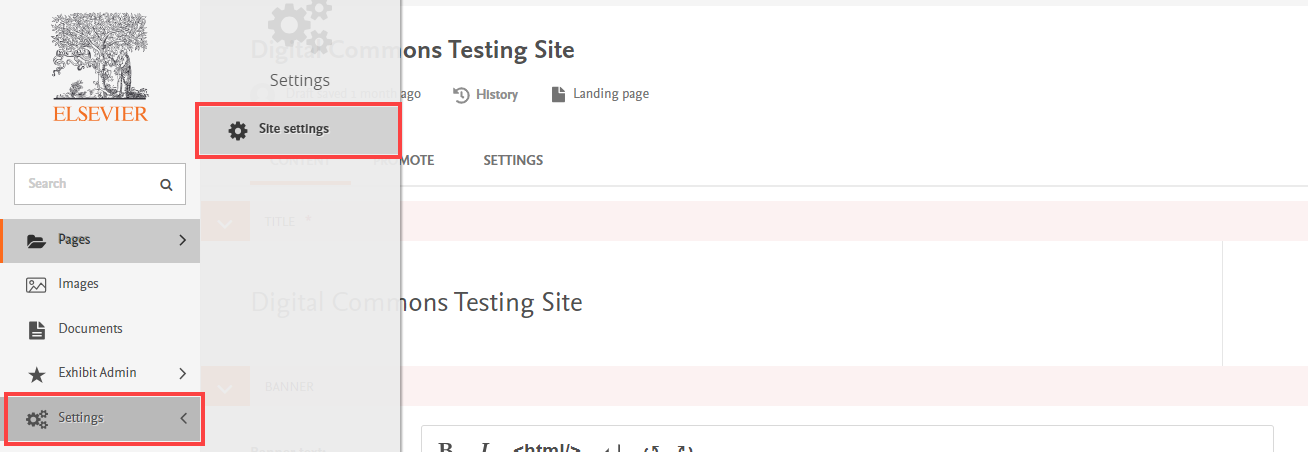
- Click Settings in the admin sidebar and then select Site settings.
- Click Choose an Image to add an image for your logo (recommended dimensions: 256 x 256 pixels) and also for your banner (recommended dimensions: 1920 x 400 pixels). You may choose a favicon for the browser tab as well (16 x 16 pixels recommended).
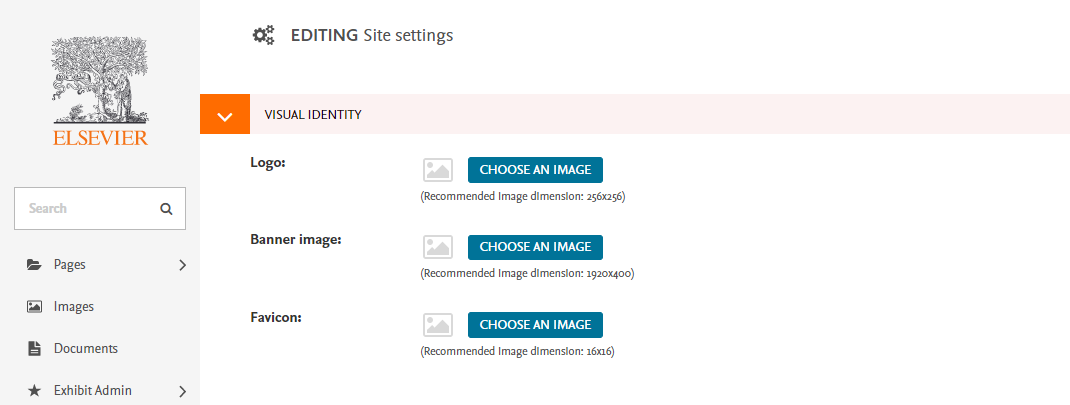
- When done, publish the changes by clicking Save.
Once you’ve published your site banner, you can view the live site and try adjusting the size of your browser to see if it is responding as desired. If needed, you can designate a focal point by clicking the Edit This Image button for the banner image (the button will appear on the page pictured above once an image has been uploaded). See Upload or Search for Images in DCX for more about uploading and editing images.
Edit Site Title and Landing Page
To modify your site title and landing page:
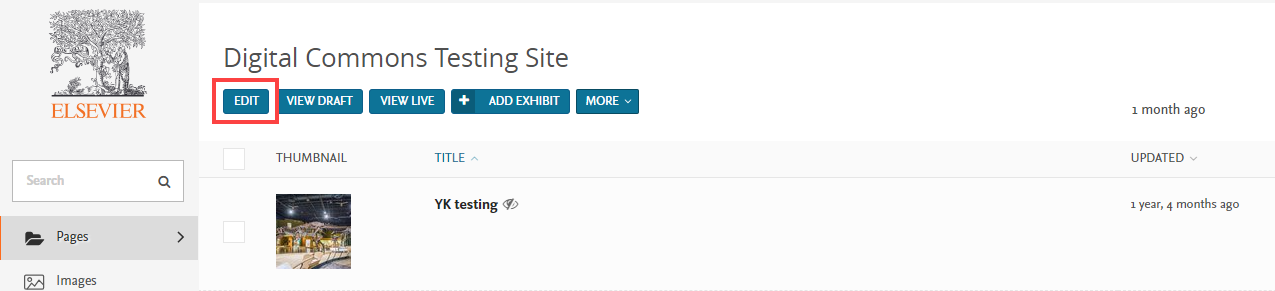
- Select Pages in the administrator sidebar and click the name of your site at the top of the menu.
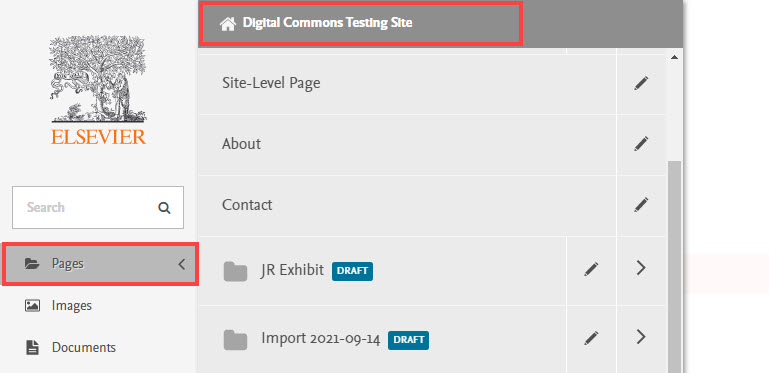
- Click the Edit button under your institution name to reach the landing page settings.
 Landing page settings:
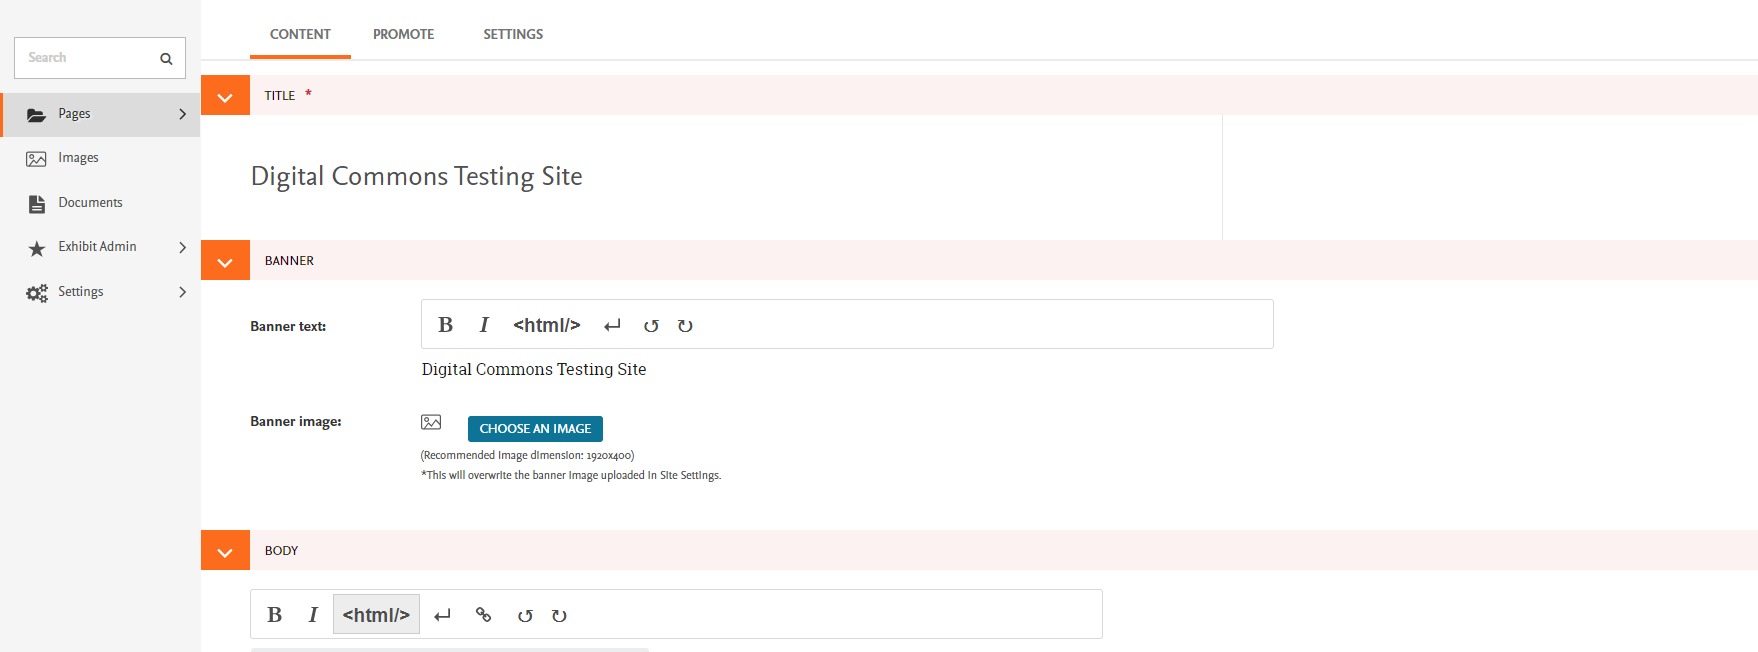
- The Title field, which is required, controls the title of the site as it will be listed in the administrative interface.
- Banner text is optional, though recommended if a title isn’t present in the banner image or logo. The banner text formatting tools allow you to include bold and italic text as well as line breaks and HTML.
- A Banner image is optional. Adding one here will override the banner image added in the site settings. If you don’t add a banner here, the landing page will show the banner from the site settings. (Should the published banner not respond as desired when you resize the page, you can designate a focal point by clicking the Edit This Image button. See Upload or Search for Images in DCX for more about uploading and editing images.)
- The Body field allows you to enter a description that will appear in the banner. This field has the same tools as the banner text field, plus an option to insert links.
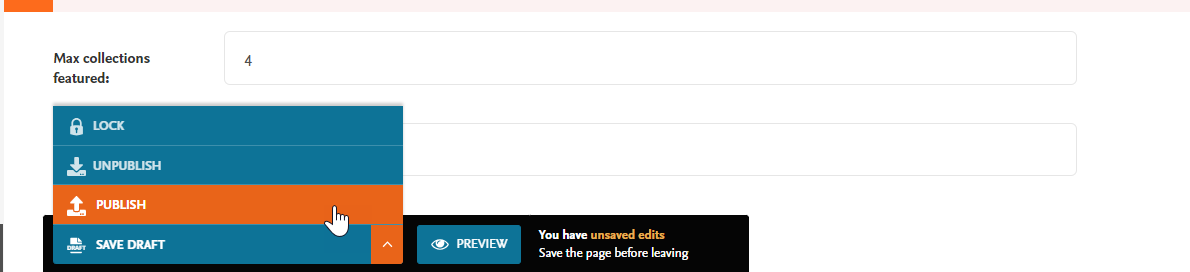
In addition to the above settings, you can use the Max collections featured setting to enter how many collections (if any) you’d like to feature at the top of the landing page. These will appear in a “Featured Exhibits” section. You may also adjust the Max collections all setting to change the number of total collections showing on the landing page under the “All Exhibits” heading.

When done, publish the landing page changes by clicking the arrow next to Save Draft to expand the menu and choosing Publish.
About and Contact Pages
Your DCX site comes with an About page and a Contact page, both of which are visible in the site navigation menu by default.

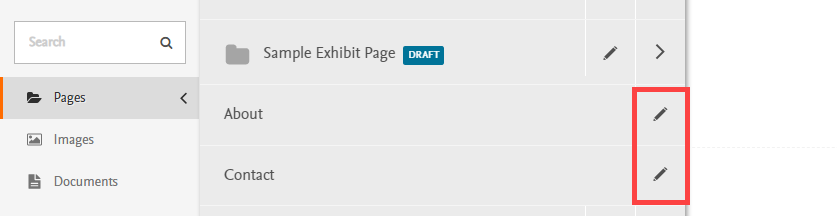
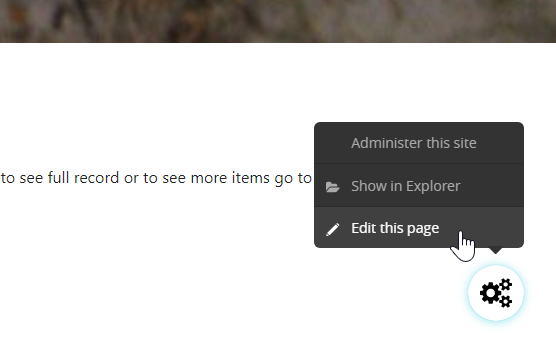
You can customize these pages with text and other elements such as images or attachments. A quick way to edit these pages is to click the gears icon in the lower right of each page when viewing the front end, then select Edit this page.
You can also reach the edit tools by clicking Pages in the admin sidebar and locating the “About” and “Contact” pages in the list of site contents.