How Can We Help?
Create a New Scrolling ExhibitCreate a New Scrolling Exhibit
Create an Exhibit and Customize Basic Settings
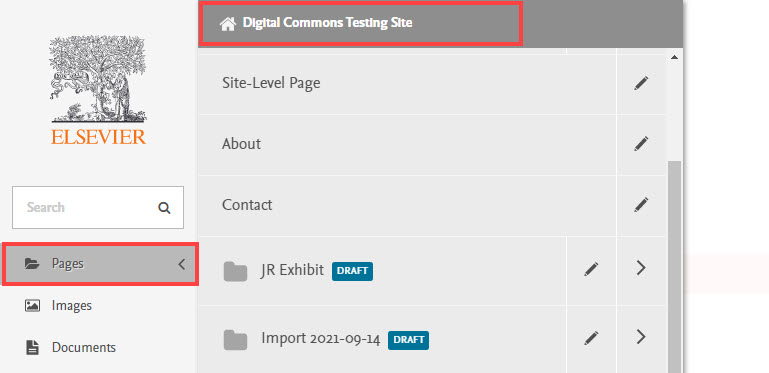
- From the DCX administrative interface: Click Pages in the sidebar, and select the site name at the top of the menu.

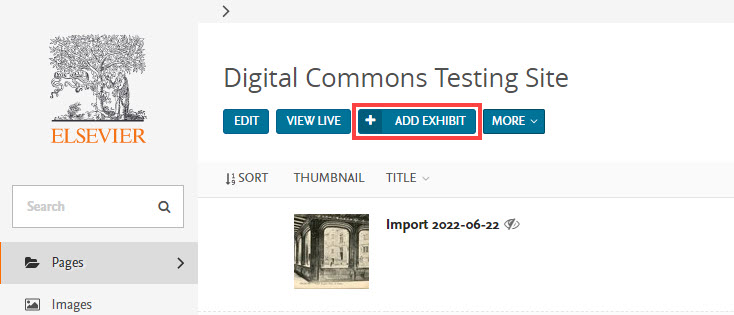
- Click Add Exhibit under the site name on the site contents page.

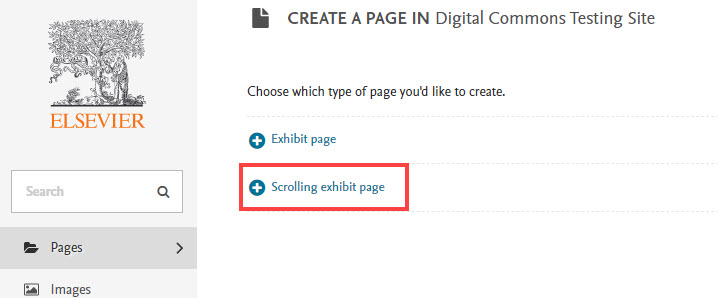
- Select Scrolling exhibit page. This option will appear below the “Exhibit page” option if you subscribe to the DCX Professional or Premier tier.

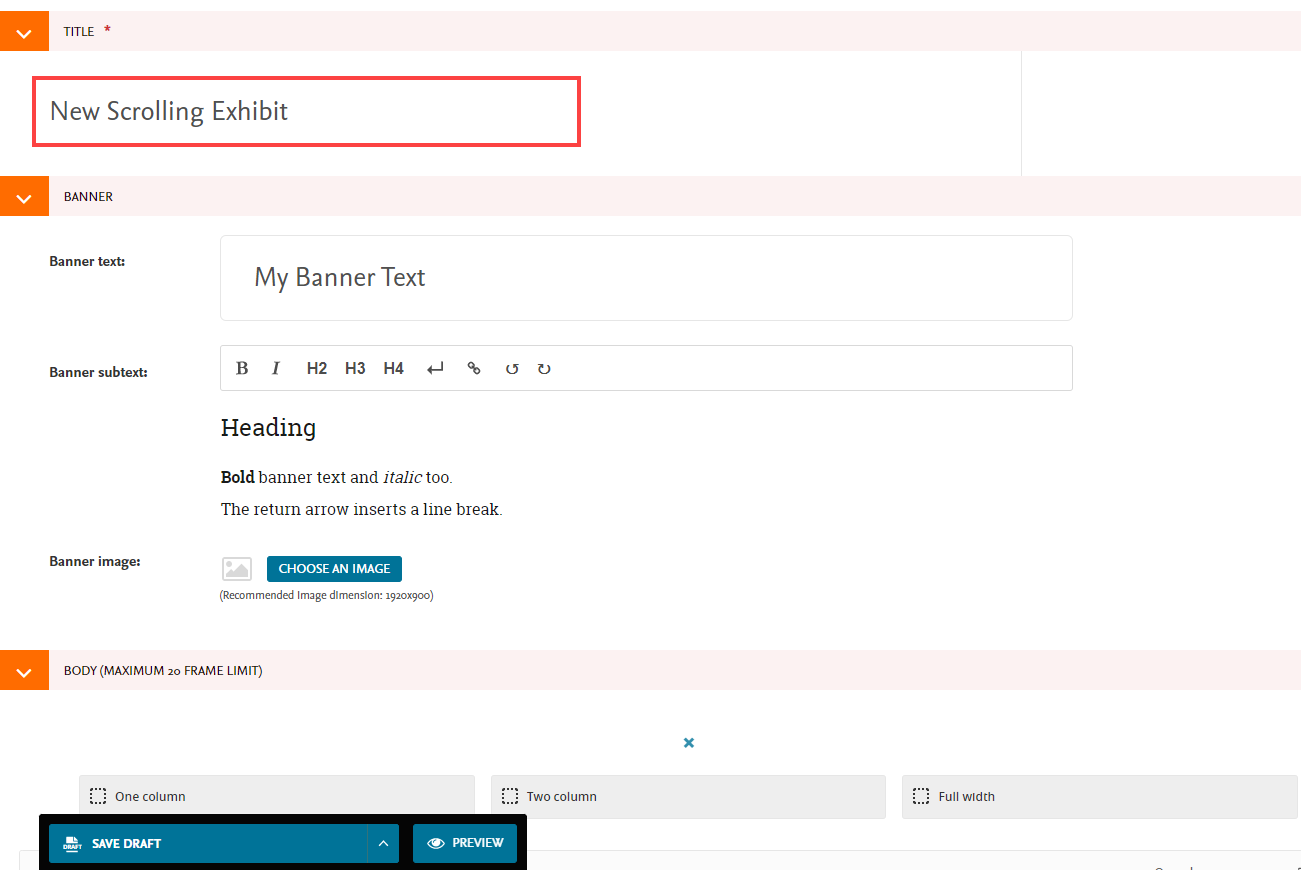
- On the exhibit edit page: Add a Title at a minimum. You can also enter Banner text and Banner subtext. Text formatting options for banner subtext include bold, italic, headings, line breaks, and links.

- To add a Banner image: Click Choose an Image and either upload a new image or search for images already present on your exhibit site. Recommended dimensions for the scrolling exhibit banner image are 1920 x 900 pixels. See Upload or Search for Images in DCX for additional details about working with images, if needed.
- To continue building your exhibit, proceed to the Body section to select and populate frames as described in Add or Revise Content in a Scrolling Exhibit. To return and complete the scrolling exhibit later, click Save Draft at the bottom of the edit page.
Saving and Publishing Your Scrolling Exhibit
Anytime you wish to save your work in an exhibit, or if you need to step away and return later, click the Save Draft option at the bottom of the edit page.

Click the Preview button to see how a new exhibit, or changes to an exhibit, will display when live.

Click the arrow next to Save Draft and select Publish to make your scrolling exhibit live or if you need to publish any new changes.

You can set an exhibit to private if you'd like to hide it from public view while working on it. If your exhibits site is currently set to private, the scrolling exhibit will automatically inherit that privacy setting. To hide the exhibit on a public site, see Change Scrolling Exhibit Visibility or Thumbnail.
 Digital Commons Help Center