 Digital Commons Help Center
How Can We Help?
Content Types in Scrolling ExhibitsContent Types in Scrolling Exhibits
When you add frames to build your scrolling exhibit, you will have different content options such as paragraphs, images, image transitions, and/or embeds depending on the type of frame you’re adding. Below is an explanation of the tools for each option.
Paragraphs
Paragraph blocks have the following text formatting tools (from left to right). Hover over each icon to see the tool name plus the keyboard shortcut or markup equivalent.

- Bold and italic
- Headings (H1 is already used in the banner)
- Numbered and bulleted lists
- Horizontal line
- Line break
- Link
Images
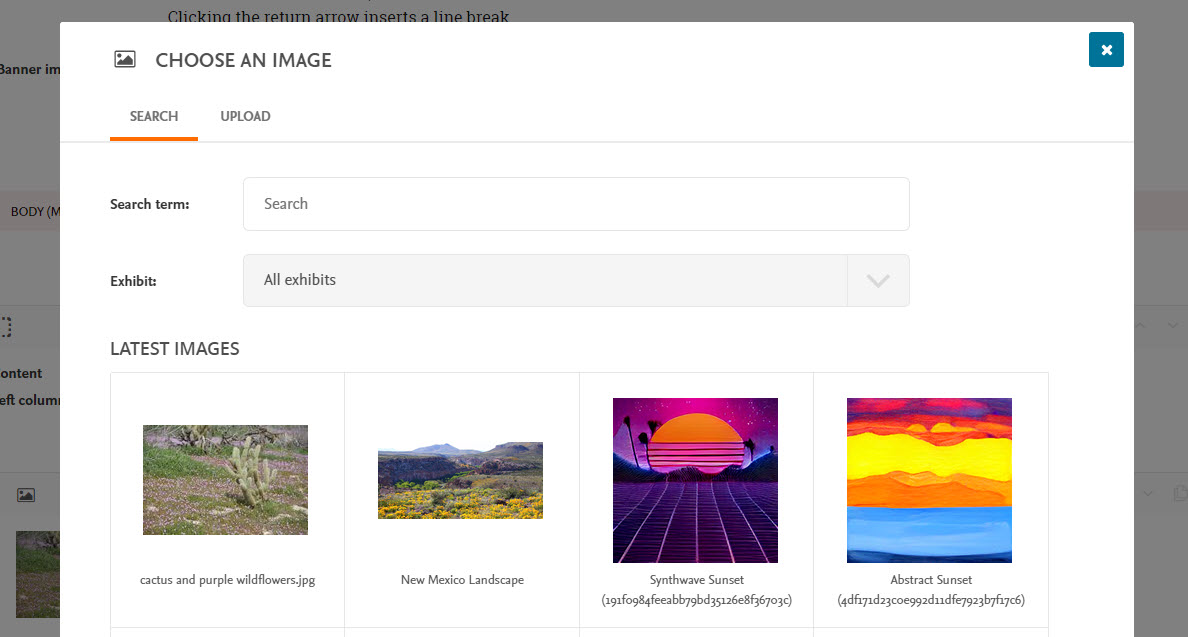
For images, you’ll see a Choose an Image button.

Clicking Choose an Image opens a window with two tabs: Search and Upload. The Search tab allows you to search previously added or imported images on your DCX site. Enter search terms to filter the results if needed. Click an image to select it, which closes the window.
To upload an image instead, select the Upload tab and click Choose File to locate and select an image on your computer. The Title field will automatically populate with the name of the file you selected. You can manually enter a different title if desired. Tags are optional, though helpful for finding images in larger collections.
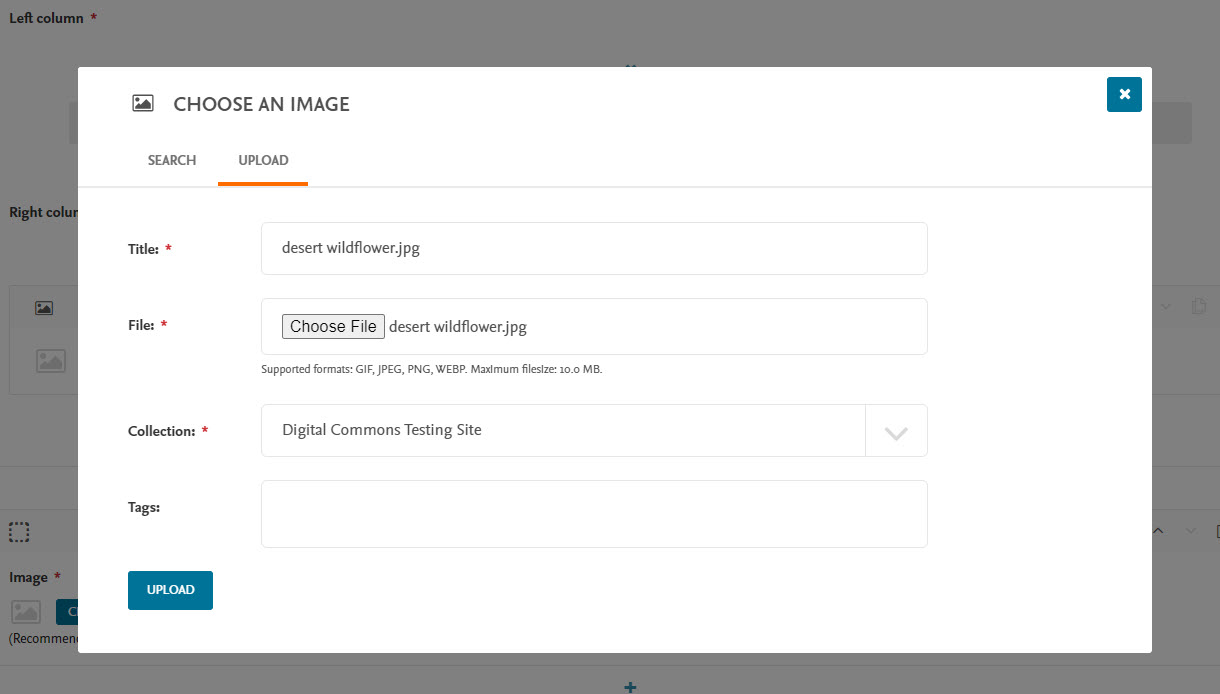
In the Collection drop-down menu, you can leave the default option (your institution name by itself) to save the image with other uploaded images on your site.
Click the Upload button when done.
Embeds
The embed option supports both Embed.ly and oEmbed to add third-party media into any frame type. Available sources include common platforms such as YouTube, Vimeo, SoundCloud, Kaltura, Sketchfab, Flickr, Google My Maps, and more.
After you create a new frame, click the Embed button.

Enter the link of an external item you’d like to include.

You can view the result by clicking the Preview button at the bottom of the screen.

Slideshows in Full-Width Frames
When adding more than one full-width image in succession with the Slideshow option, you can select whether you’d like a dynamic transition between them.
First add a Full width frame in the desired location and select Slideshow (as in steps 2-3 on Add or Revise Content in a Scrolling Exhibit). Next, select an Image block.
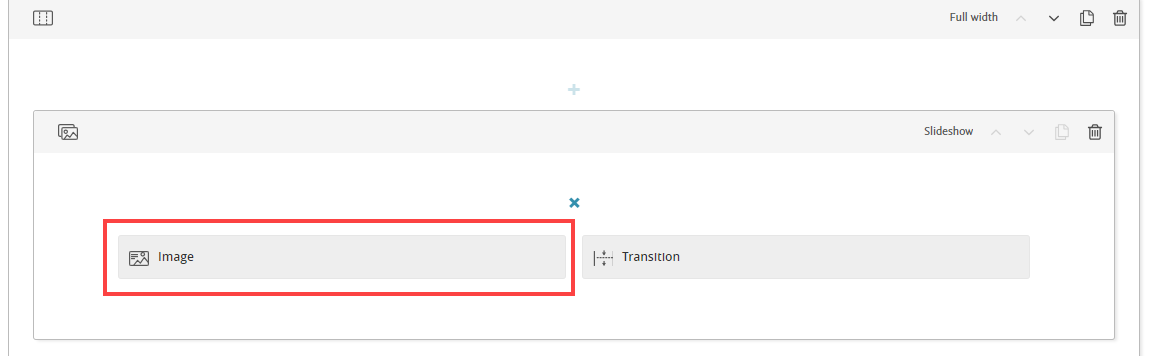
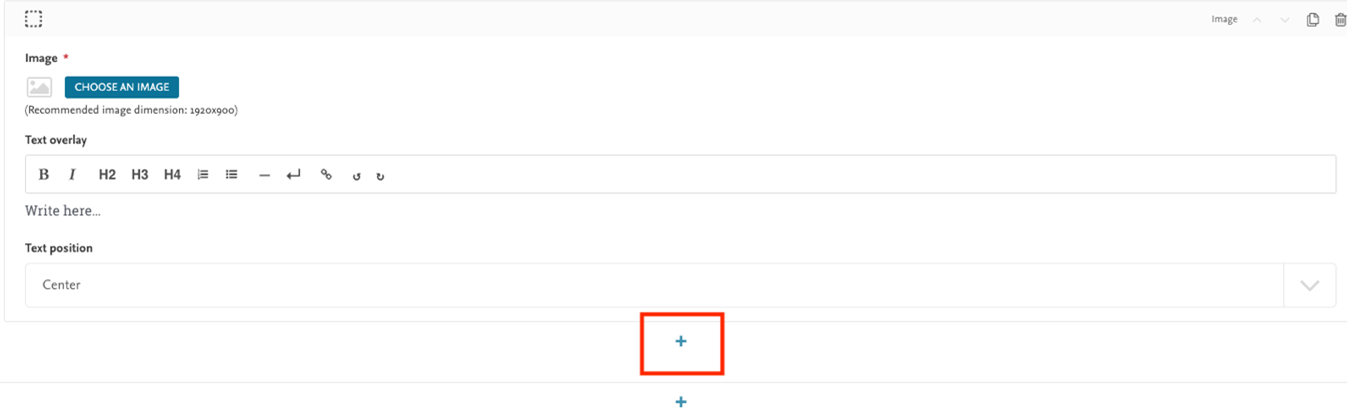
Choose or upload your image, as described above under “Images.” If desired, you can add a text overlay for the full-width image using the available text formatting tools, and you can also change the position of the text.
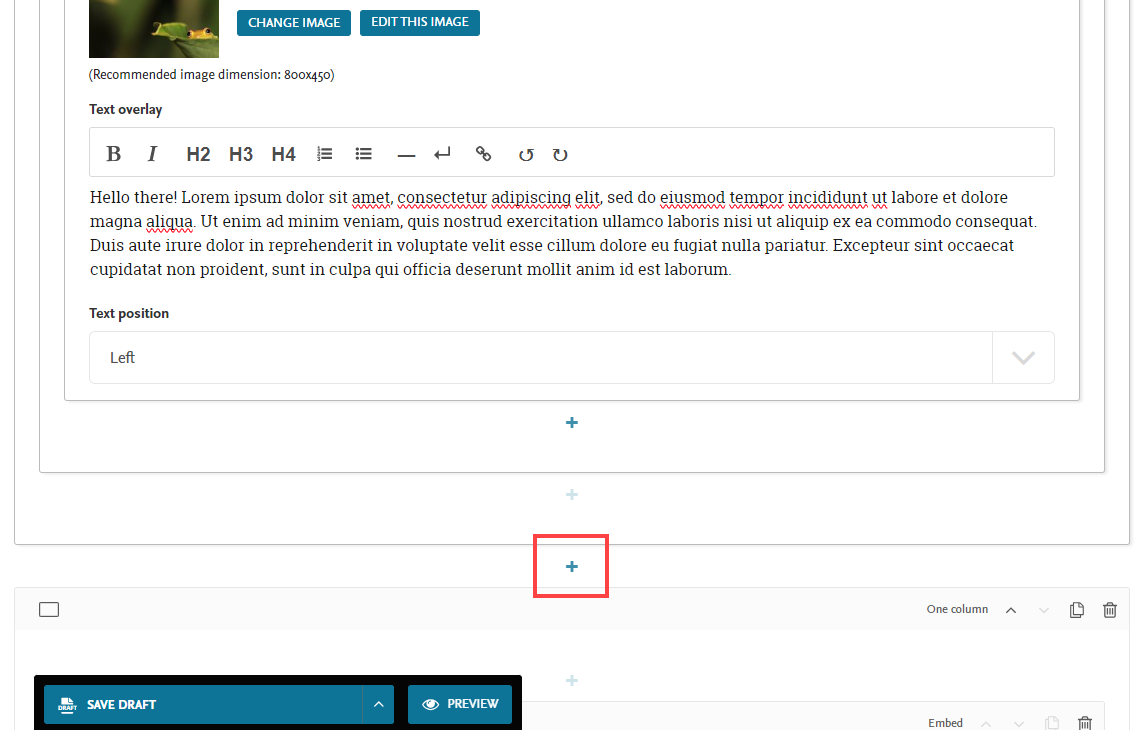
When done with the first image, click the + plus icon directly below the “Text position” selector.
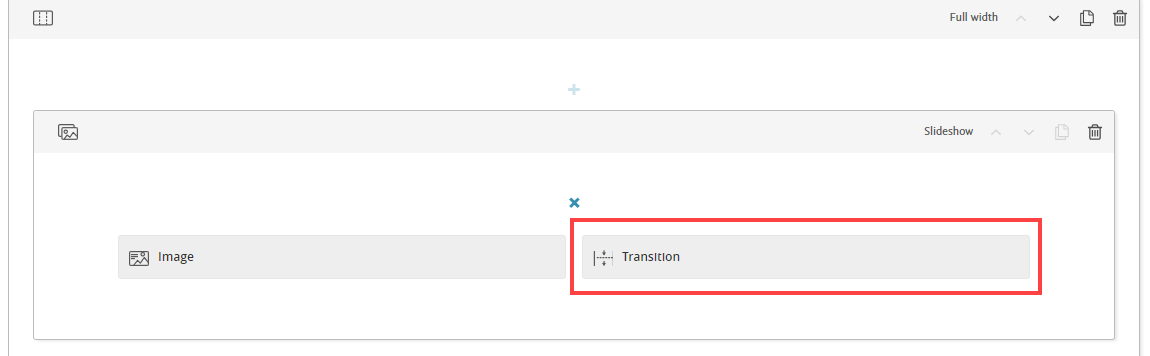
Options will appear to add either another image or a transition; select Transition.
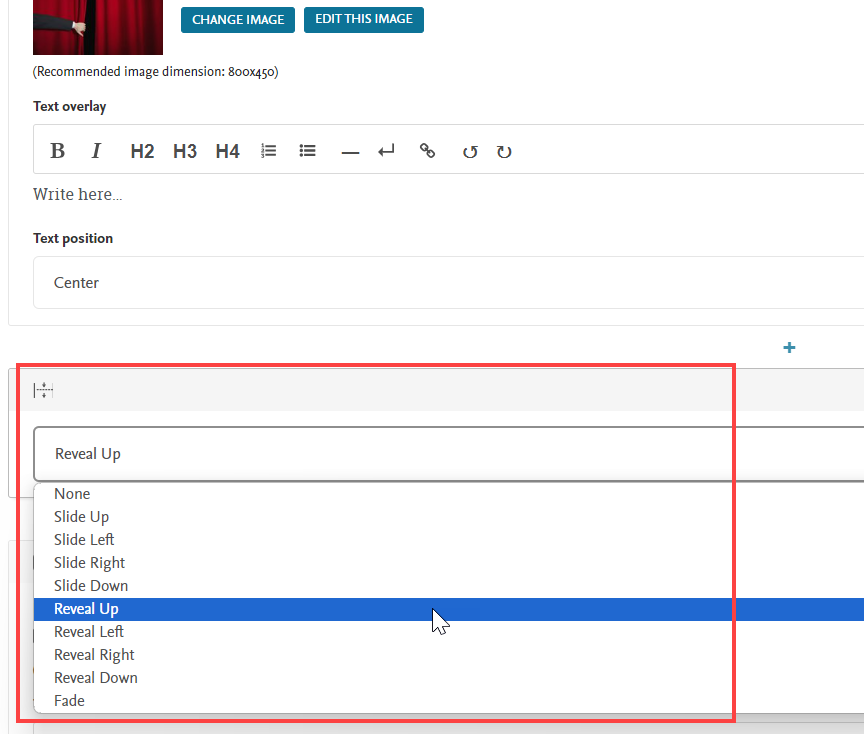
Use the dropdown to select which transition you’d like to apply.
For the transition to apply, you will need to have another full-width image following. To add one, click the + plus icon directly below the transition dropdown.
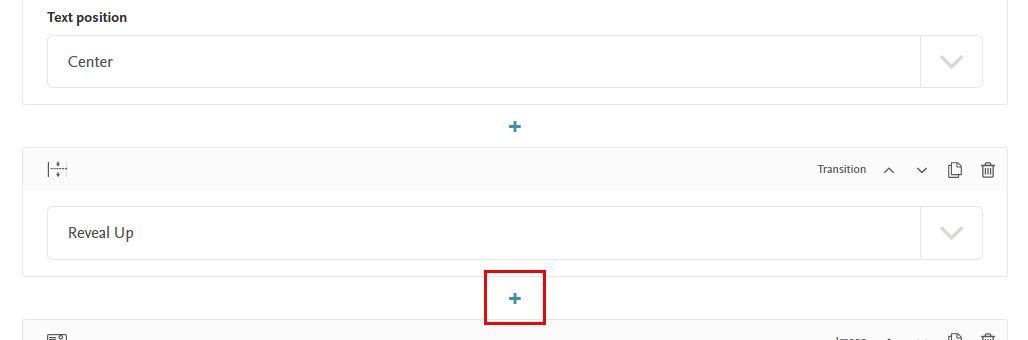
You will again have the option to add either an image or a transition; select Image and follow previous instructions to choose an image.

Once you're finished building the slideshow, if you’d like to add another frame (rather than adding more full-width images in the current frame) click the + plus icon outside the frame box:
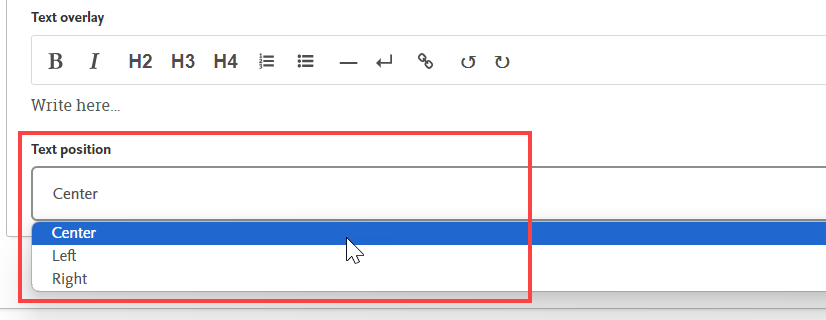
Text Overlay on a Full-Width Image
After adding an Image block in a full-width frame, you can use the Text overlay section to add text. Text overlays appear with light text over a dark background for readability.
Text formatting options are the same as those described previously for paragraph blocks.
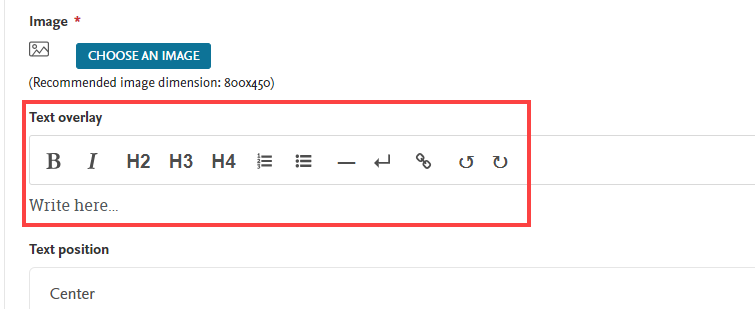
The Text position menu allows you to choose a desired location: center, left, or right.