How Can We Help?
Add a Section to an ExhibitAdd a Section to an Exhibit
If you want to subdivide items within an exhibit, you can add sections to contain categories of items within the exhibit. Section content is populated by moving items from exhibits or from other sections.
For a video on this topic, see Create a Section in a DCX Exhibit.
Create a New Section
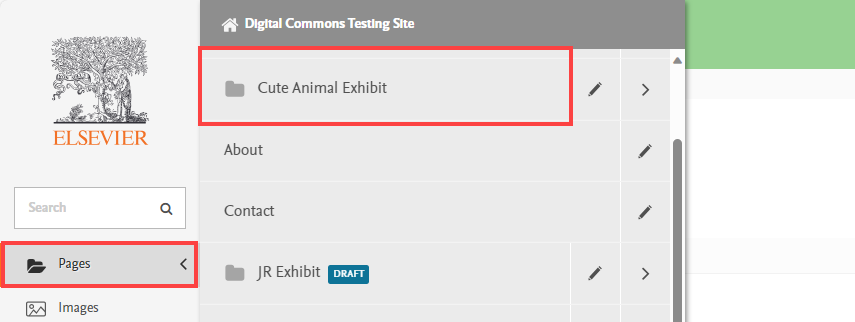
To add a section to an exhibit, click Pages in the administrator sidebar, and then click the name of the exhibit.
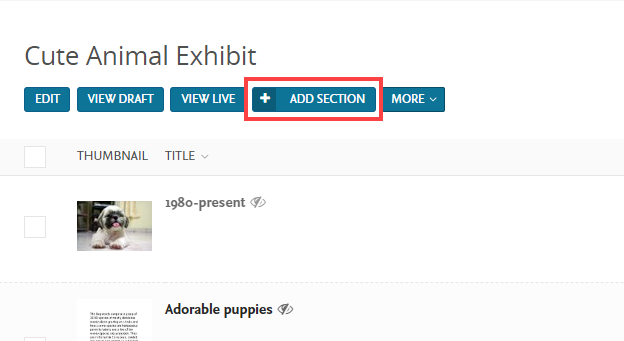
On the exhibit contents page, click the Add Section button under the title of the exhibit.
Next, enter a section Title. You can also switch the layout from a Grid layout to a Gallery layout if you wish to display more of a “compound object” view (see “Create a compound object using gallery layout” below for details). To make these options appear if they aren't displaying yet, first save a draft of the section by clicking the Save Draft button at the bottom of the edit page.
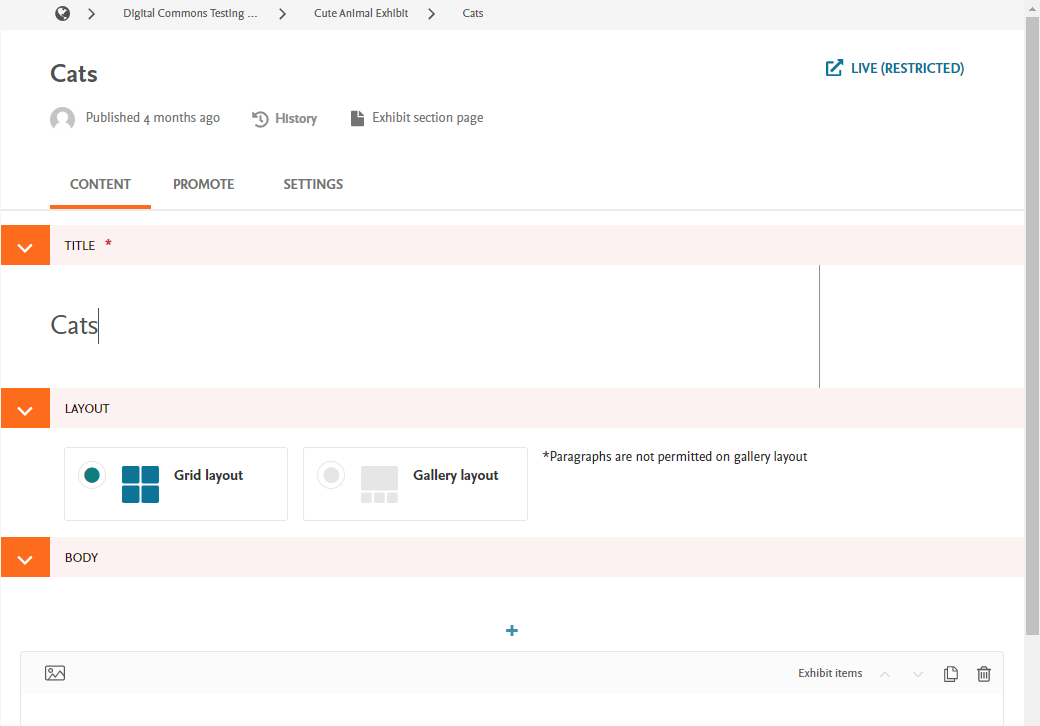
The section will inherit the banner, background color, and font choices from the exhibit.
Add a Description and Other Section Page Content
To add a description that will display on the section page, select the Paragraph block option under Body (you may need to click the plus symbol first to show the Paragraph block).
Paragraph blocks are only visible when using the Grid layout. If you will be creating a compound object with your section using the Gallery layout (see “Create a compound object using gallery layout” below), the description will not display. However, it will still be available if you switch back to the default Grid layout.

After clicking the Paragraph option, a paragraph block editor will open where you can enter descriptive text that also includes images (using the ![]() image icon) as well as video and other embedded content (using the
image icon) as well as video and other embedded content (using the ![]() embed icon).
embed icon).

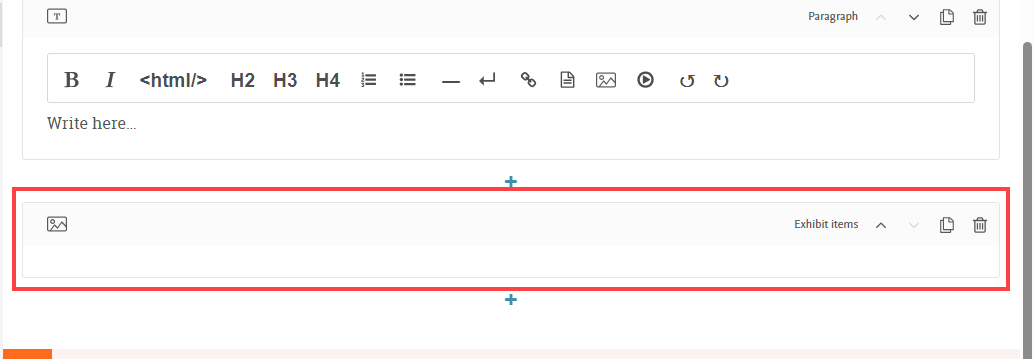
After you’ve added your text, double-check that an Exhibit Items block appears below your descriptive text. (If it does not, click on the plus sign and choose the “Exhibit Items” option to create a new block.) This ensures that items in the section display in the desired location.
Click Save Draft at the bottom of the page. Or, if ready, click Publish in the expanded menu to publish the section. You can wait to publish until after you move items into the section as described in the steps below. Sections can also be published without items, if desired—for instance, if you wish to include an informational page within an exhibit.
Populate a Section with Content
Once you have created your section, you can add content by bulk moving items from an exhibit. First, be sure the items are imported into an exhibit. You can also move content from additional exhibits and/or other sections, if desired.
To move items into a section, follow the steps for bulk managing content in Publish, Unpublish, Move, or Delete items and select the section as the destination for the items.
If not yet published, the section will need to be published once you’re done moving items to it. Items will retain the same visibility they had prior to moving:
- If items were live in the source exhibit/section, they will be live in the section once it is published.
- Any items in a draft state will remain drafts and will need to be published before they will show up in the section.
Publish a Section
Once you have finished moving items to the section, you can publish the section. Select Pages in the sidebar and then click on the exhibit that contains the section.

The parent exhibit contents list will show the list of items in the exhibit as well as any sections that are in that exhibit. Sections are labeled as “Exhibit section page” in the Type column, and Exhibit items are labeled as “Exhibit item page.” To view section contents, click the arrow to the right of a section row.

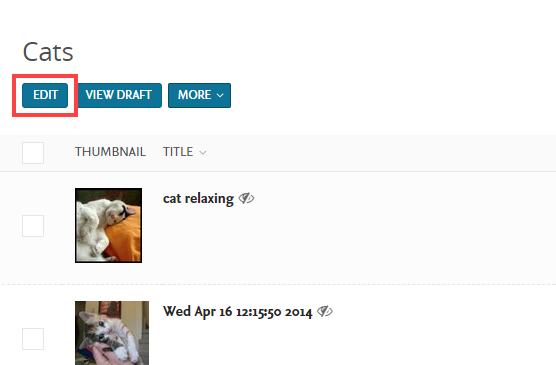
To publish the section, click the Edit button under the section title.
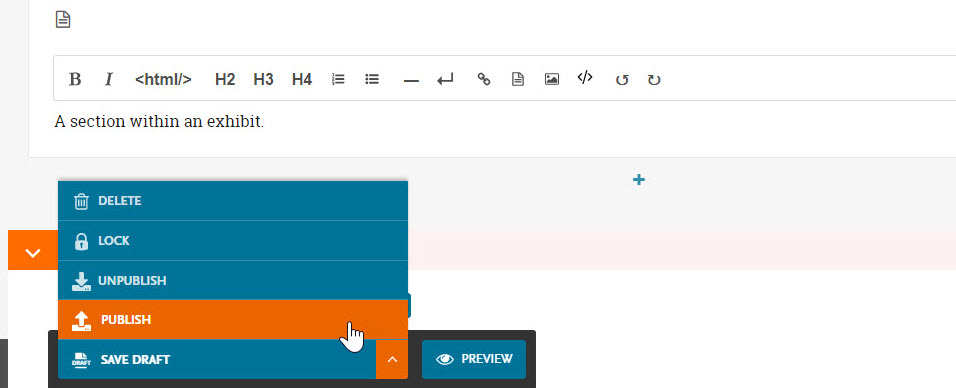
The click Publish in the menu at the bottom of the page.
As mentioned previously, any items in a draft state will remain drafts and will need to be published before they will show up in the section.
Section Display and Thumbnail Image
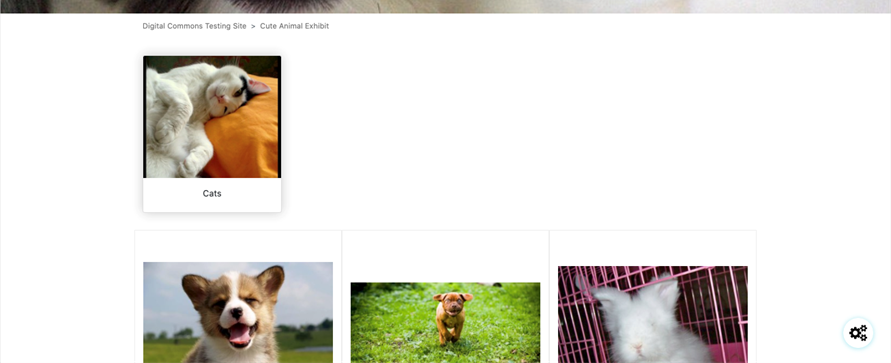
When you go to the live exhibit, you should see a thumbnail image for each section at the top of the exhibit contents. Any items that are in the exhibit, but which have not been moved to a section, will appear below that.
You can customize the thumbnail image that displays for the section on the exhibit page, if desired. To do so, scroll to the bottom of the section edit page and select Choose an Image to either upload an image or select one already uploaded to the site.
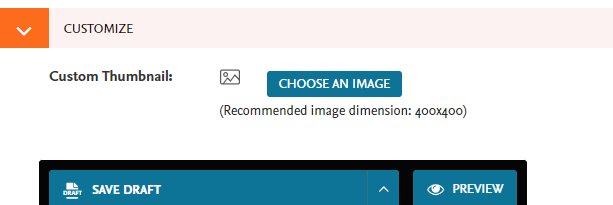
Select Save Draft when done or, if ready to publish changes, expand the menu and select Publish.
The display of the section page is in a grid layout by default, just like an exhibit page, unless you select the Gallery layout option described below.
Use Gallery Layout to Create a Compound Object
Sections offer a Gallery layout option if you wish to group related items together into a “compound object” view. With this layout, each specific item appears with thumbnails of the other items below it, allowing visitors to easily see and move between the different aspects of an object or project.
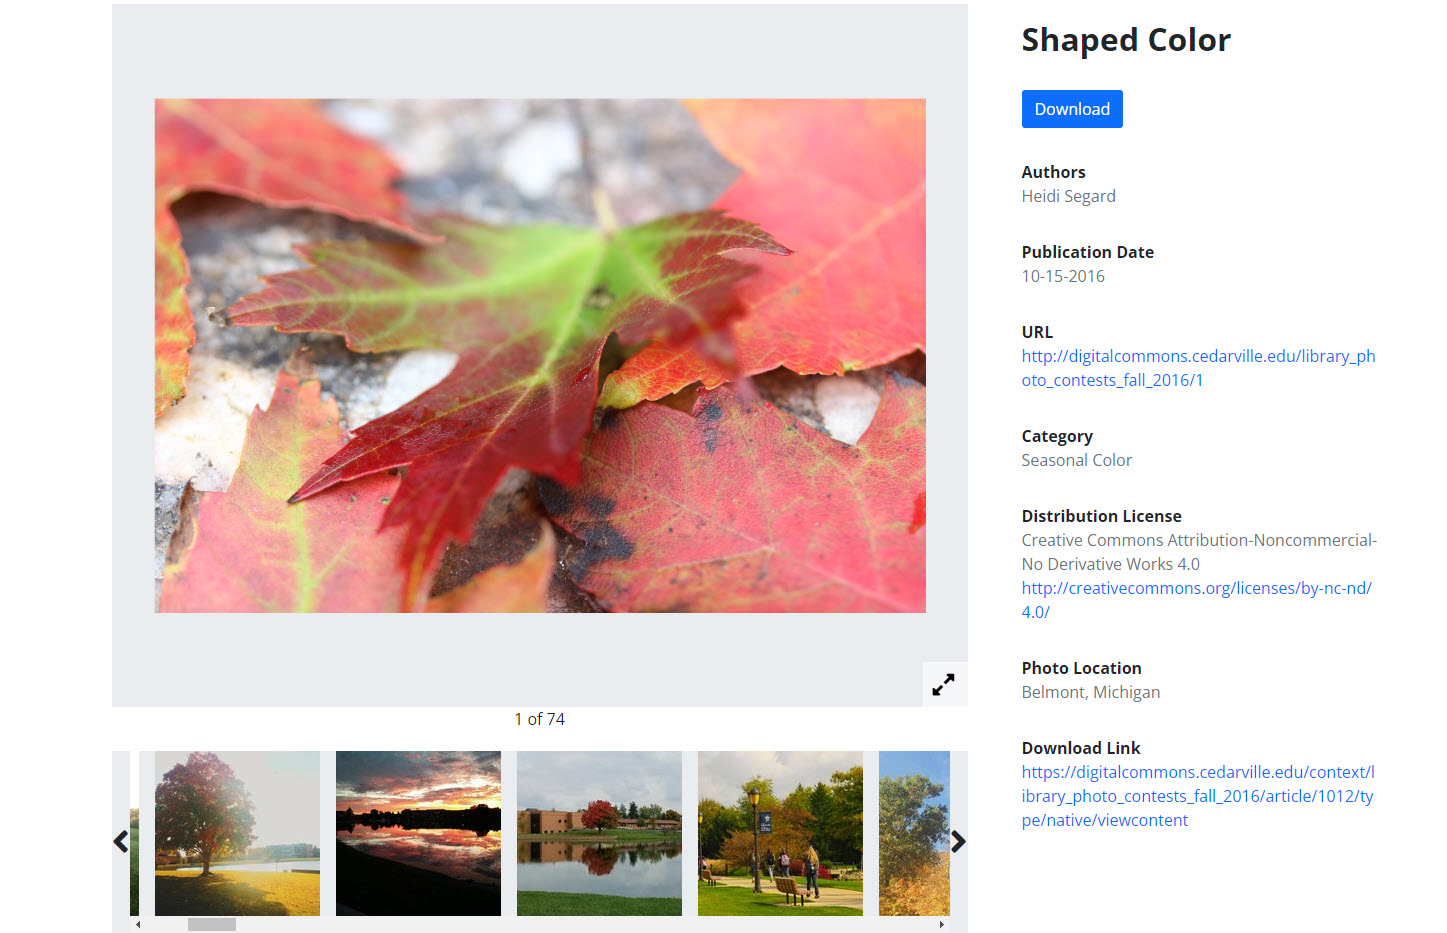
Users can either click the arrows to navigate the thumbnails or click a thumbnail to get to that specific item’s page.
Each item within the section retains its own metadata when using Gallery layout.
Gallery layout can be used for any content, though it’s especially useful for items such as a sculpture with different views, or a person or project, where associated items need to be more clearly tied together and easily navigable.
To utilize this option, first create a new section as described above and either save as a draft or publish the section. Then select Gallery layout on the section edit page.
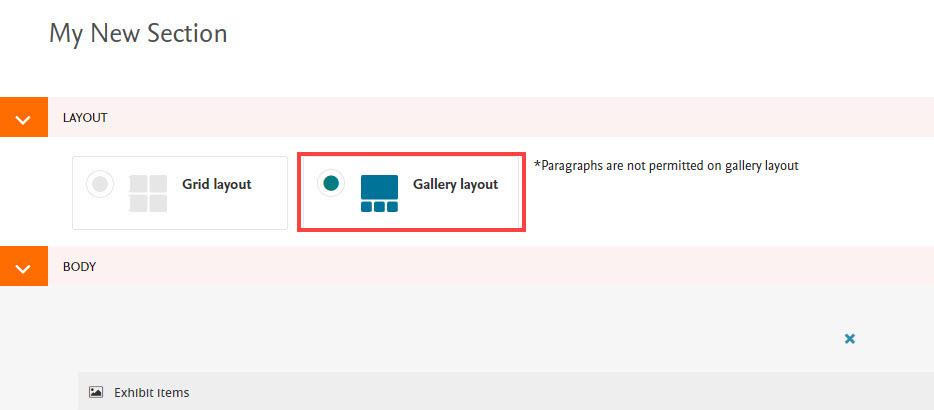
Expand the Save Draft menu at the bottom of the page and select Publish to make the gallery layout live.
Note: When using gallery layout, paragraph blocks are disabled for sections and items due to the compound object display. If you change an existing section from Grid layout to Gallery layout and it has a paragraph block, the paragraph block and any text entered will be saved, but they will not be visible. They will become available again if you switch back to Grid layout.
 Digital Commons Help Center