How Can We Help?
Publish, Unpublish, Move, or Delete itemsPublish, Unpublish, Move, or Delete items
You can move, delete, or publish/unpublish items in bulk or on an individual basis. For instance, you can move multiple items from one exhibit to a different exhibit or section. Or you may want to unpublish an outdated item in an exhibit.
Bulk Manage Content in an Exhibit or Section
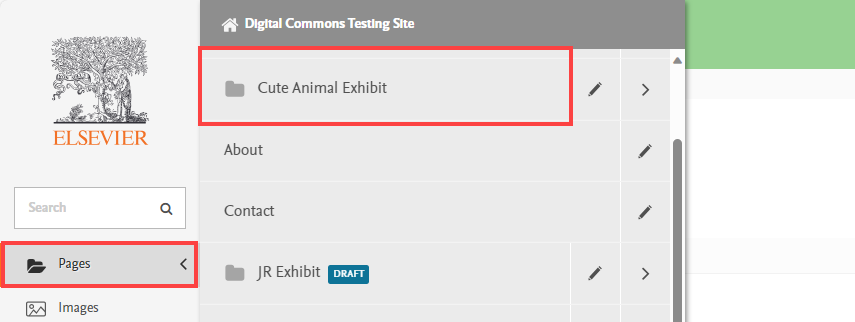
- Click Pages in the administrator sidebar, then click the title of the exhibit.
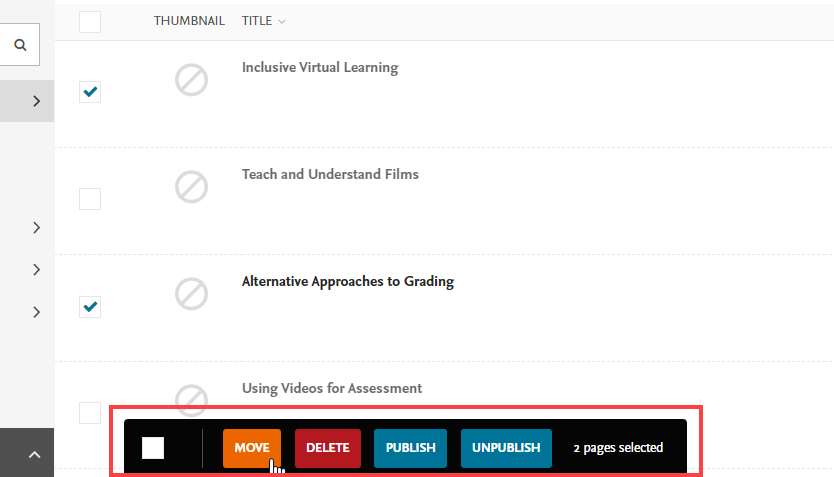
- Checkboxes will appear to the left of the items and sections in the exhibit. (Items are marked with “Exhibit item page” in the Type column and sections are marked with “Exhibit section page.”) Select the checkboxes next to the items or sections for which you’d like to perform an action: either move, delete, publish, or unpublish.

- If you want to manage items within a section, first click the arrow to the right of the section to reach that section's items, then select the checkboxes as described above.
- Select the desired action from the menu that appears at the bottom of the page.
- You will be asked to confirm the action on the following screen.
Manage an Individual Item or Section
Navigate to the item/section in the exhibit contents list as above and hover over the item to reveal its options.
- To publish an item, hover over it and select Edit, then expand the menu at the bottom of the item edit page and select Publish.
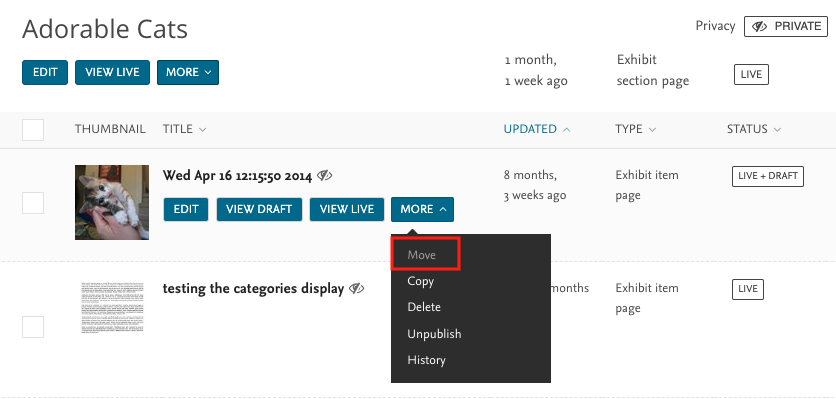
- To perform any of the other actions, hover over the item and select from the item’s More menu. (Unpublish will only show up in the menu for currently published items; and it won't appear for sections.) Confirm the action on the subsequent screen.
- If moving an item, there are a couple of extra steps:
- First, hover over the item and select Move.
- Click Next.

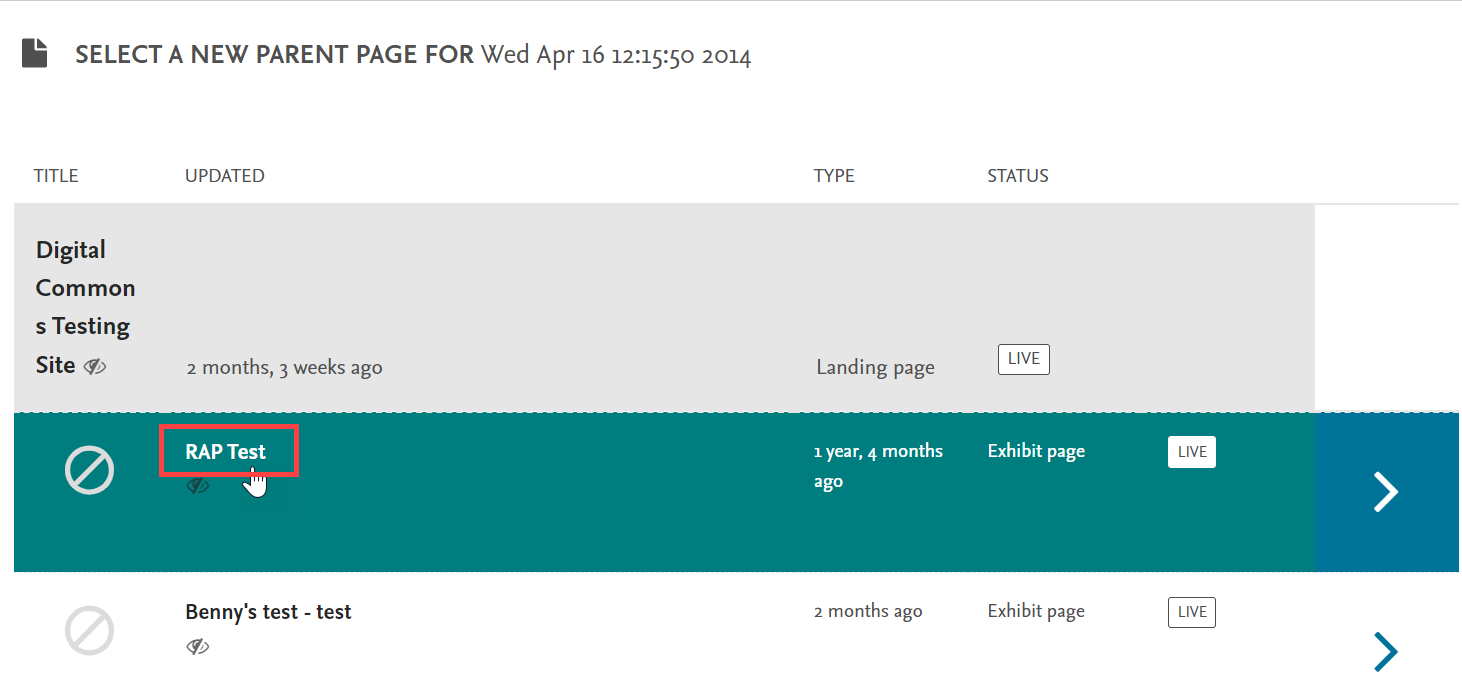
- Click the title of the exhibit to which you’d like to move the item. (If moving to a section, first click the arrow to the right of the containing exhibit and then click the title of the section.)
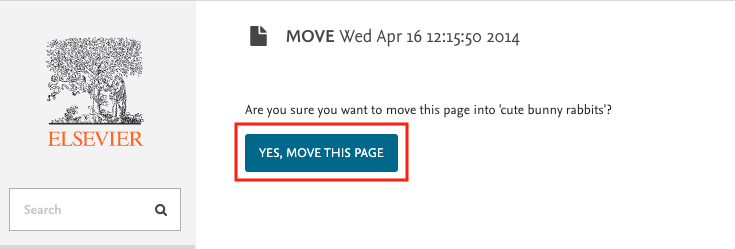
- Click Yes, Move This Page.
- First, hover over the item and select Move.
Copy Items so They Appear in Multiple Locations
If you already have an item in an exhibit or section and want it to appear in its current location and also in another location, you can copy it. The steps are similar to moving items, described above, but you will select Copy instead of Move in the item's “More” menu.
Copy an item:
- Click Pages in the admin sidebar and select the name of the exhibit. (If copying an item from a section, click the arrow to the right of the section once you reach the exhibit contents list.)
- Find the item you want to copy and hover over it to reveal its options.
- Select the More menu.
- Select Copy.
- If copying to a different exhibit/section, you can leave the existing slug. If you are copying the item to the same exhibit/section it’s currently in, you’ll need to give it a new slug so it gets a unique URL.
- By default, it will copy to the same exhibit/section it’s currently in. To copy to a different exhibit/section instead, select Choose Another Page.
- To automatically post the copied item, check Publish copied page. If this is unchecked, the copied item will be a draft.
- To keep the copy updated with changes to the original, check Alias.
Copy an exhibit or section:
You may also copy whole exhibits or sections, using the More menu of an exhibit or section, in the same manner as above. A few extra options will appear when copying exhibits/sections compared to items; you can generally leave them as is.
- “Copy subpages” will be checked automatically and indicates that items contained within the exhibit/section should be included; leave this checked to bring over all items.
- “Publish copies” will publish any of those pages that are currently published in the original location; you can leave this unchecked to create drafts and or you can check this if you’d like to publish those items right away.
 Digital Commons Help Center