How Can We Help?
SelectedWorks Guide for AuthorsSelectedWorks Guide for Authors
Expert Gallery Suite was retired in April 2025.
SelectedWorks offers clear navigation and a responsive layout to engage visitors with the full range of your scholarship, from teaching materials to streaming video and audio. This author guide covers the basics in creating and managing a SelectedWorks profile.
Build Your SelectedWorks Profile: Three Easy Steps
Create an Account
- Go to http://works.bepress.com, click on the Menu link
- Click Sign Up (or Login if you already have an account)
- Complete the form and click Create Account
- Click the Confirm Account button in the confirmation email
Build Your Profile
- Once logged in, on the Build your SelectedWorks prompt, choose a URL (note—it cannot be revised afterward)
- Choose up to three research disciplines
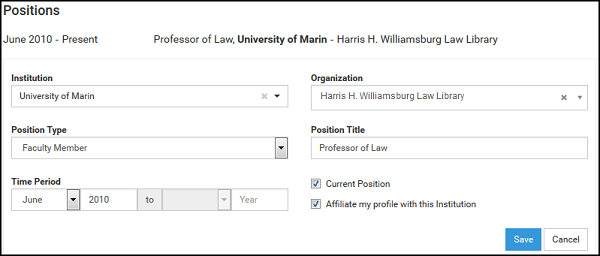
- Enter your institution, organization, position, and position title
- Check mark the box next to I agree with the Terms of Service
- Click Create Profile
Congratulations, you now have a profile!
Customizing Your Profile
Profile Introduction
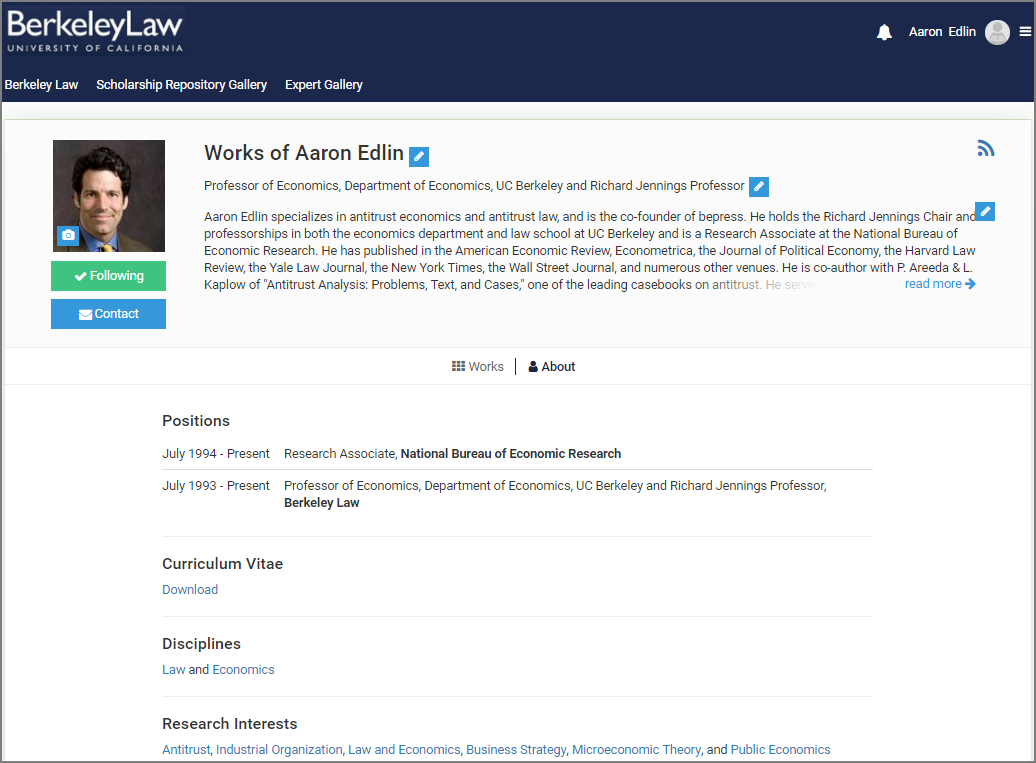
Acquaint visitors to your site by adding a descriptive summary of you and your research. Simple editorial icons provide inline editing throughout, allowing you to easily access each section to quickly add, modify, or remove content:

- Hover your cursor over the introductory section to reveal the blue pen icon.
- Click on the icon to add your intro text. Basic formatting options, including bold, italicize, and hyperlinks, are available.
- Click Save.
Memberships and Contact Button
For profiles at Expert Gallery Suite (EGS) subscriber institutions, we offer Media Contact, Collaborator, and Mentor membership badges.

When enabled, badges appear on select profiles and link directly to the institution’s Expert Gallery.
Contact buttons make is easy to connect authors and researchers with opportunities, and are available based on institutional settings. Badges and contact button settings are managed by an institutional administrator. To learn more, please see Managing Memberships and Contact Buttons.
Add Your Biographical Information
- Click on the About tab
- Hover your cursor above a section to reveal icons to help you edit your profile
- Enter information as you would like it displayed—no coding skills required
While all sections appear to you while logged into your account, only the completed sections will display publicly.
Tip on Positions:
Some authors have multiple positions. To affiliate your profile with your primary position, check the box Affiliate my profile with this Institution. If your institution has a SelectedWorks account, affiliating your profile will also enable institutional colors and logo onto your site.
Adding Works
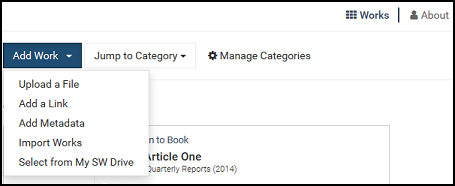
Easily add work to your profile by uploading a file, adding a link, adding metadata, importing works, and selecting from your My SW Drive.
Adding Your Work
- Click on the Works link on your profile
- Click Add Work to select your option (outlined below)
Upload a File
To add a file from your computer or from another online source, including Dropbox, Google Drive, and OneDrive, choose Upload a File.
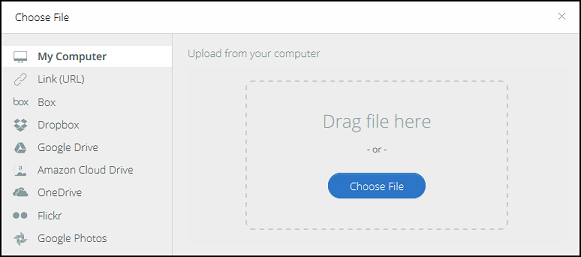
Follow the prompts to select a Type of Work that matches your file, complete all applicable fields on the Details page (required field marked with a red * asterisk), and click Add to Profile.
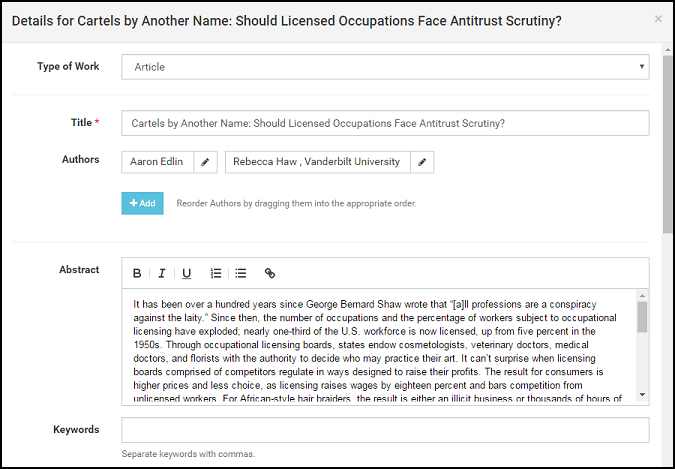
Tips: A thumbnail image for the Card View is automatically generated from the first page of each uploaded work. You can replace by uploading an image of your choosing, if preferred.
Cover pages are also automatically created for all PDFs and include author information and links to your profile to help increase traffic. Additionally, if you upload an MS Word file, we convert it to PDF for you.
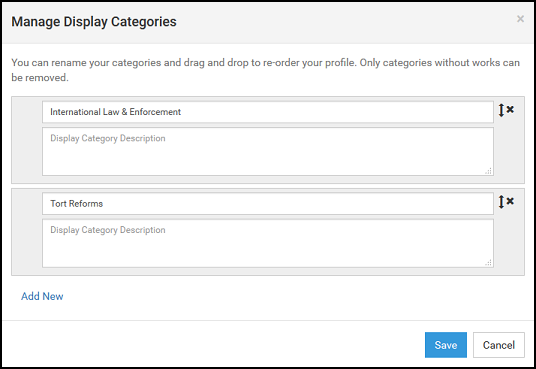
Display Categories help organize your Works tab. You must choose at least one per work. If more than one category is chosen, the work will appear under each category you selected. Display Categories and their descriptions are indexed within Google and other major search engines along with the profile and works. By creating Display Categories and descriptions that are unique to the profile and faculty’s discipline, faculty can increase their discoverability and drive more traffic to their profile and works.
Add a Link and Add Metadata
When uploading a link to your work, click Add a Link from the Add Work menu, and provide the full URL address (e.g., http://www.website.com). Use Add Metadata to upload your content details only (i.e., title, abstract, etc.). Whether you upload a link or metadata only, you will be prompted to select a Type of Work and complete the Details page.
Import Works
Select Import Works to retrieve all works in the bepress system associated with your name and email address, and automatically bring them into your profile. You may repeat this periodically to gather works posted in the future.
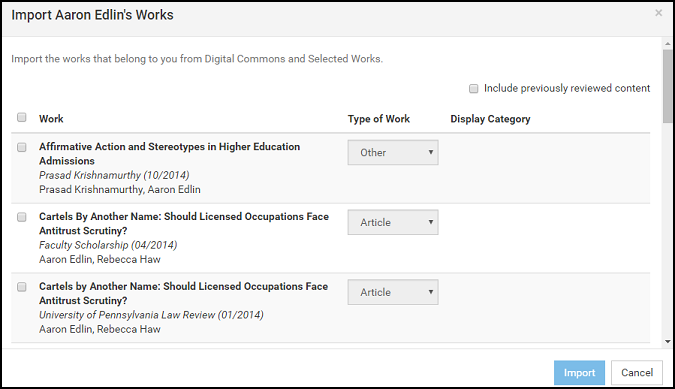
If you have multiple email addresses or name aliases, see the Account Settings section under Managing Account and Access Settings below, to help ensure all of your works appear when using this feature.
My SW Drive
Not ready to post your work to your profile yet? Save drafts of your upload by clicking Save Draft to My SW Drive. Access My SW Drive via the Profile Menu link (located at top right of page) to modify, manage, and post. You can also add additional files, update posted works, or remove content from your drive.

Managing Works
Revising and Removing Works
Easily revise your works by clicking on the Edit icon or by accessing your My SW Drive. On your drive, click on the article title to bring up the work Details page to make your update(s).
Removing your work is quickly accomplished by clicking on the red Trash icon. A prompt to confirm the action will appear, asking if you are sure you want to remove from your profile. Click Continue to complete removal. Although removed from your profile, your work will still be available on My SW Drive as withdrawn (with a gray icon). Also, a placeholder page will remain, noting simply “This work is no longer available.”
Tip: Are you unable to revise a work? It may have been imported from another site in the bepress system. If so, follow the prompt to send an email to the site’s administrator to request your revision.
Restoring Withdrawn Content
To restore withdrawn content to your profile, access My SW Drive, click on the appropriate title and click Add to Profile. Restored content will reuse the original URL address, even if newer works were posted to your site after withdrawal.
To remove an uploaded file only, access the article Details page, locate the file at the bottom of the form, and click on the red Remove trash icon. If simply replacing a file, you will be asked if you wish to replace the previous thumbnail. Click Replace Thumbnail to view the new image or upload a new one, or No to keep the existing image.
Managing Account and Access Settings
Account Settings
Click on the Account Settings link on your Profile Menu to update your picture or change your email address and/or password. Your name, as it appears under the Personal Information section, will be reflected on your account only. To change your site profile name, e.g., “SelectedWorks of Jane Doe”, click the My SelectedWorks link on your Profile Menu and use the inline editing option.
Author Information
Ensure that all of your work can be collected to your profile by adding any other name aliases or email addresses used for your published works. Click Set as Preferred for the profile you want applied automatically to all new uploads.
Privacy Options (Profile Display)
By default your SelectedWorks site is available for public viewing as soon as you complete the building steps. However, if you are just getting started and want to get your site populated with content before sharing, or if you simply wish to hide your site temporarily from public view, click the radio button next to Hide my profile and click Save.

Note: If you choose the Hide my profile option, your entire site will be hidden from public view, and your works will not be available for download.
Works Display
Two profile format options are available: the default Card View, which provides a thumbnail preview of your works; and the traditional List View. Whatever your preference, your content is organized by your Display Categories.

Email Notifications
The “reminders about unread email notification” option automatically generates an email reminder after 24 hours for any unread profile notifications (see “Notification Center” below for more information).
Your monthly hit reports provide key feedback including the number of downloads for the past month. Complete download data and additional information is available for viewing via your Author Dashboard (see “Reporting Tools” on p.7 for more information).
Access Management
Provide faculty assistants and/or library staff access to your profile to upload and manage it by adding them as Delegates to your account. Once added, an Account Confirmation email is generated. Delegates are provided full access to your profile, including your Author Dashboard.
Notification Center
All actions related to your site are tracked and listed in chronological order via your Notification Center. Click on the bell icon next to the Profile Menu to access. The number of all unread notifications is noted on the icon. After reviewing, you can click Clear All to remove.
Reporting Tools
Author Dashboard
Interested in how many downloads your work is generating? Want to know who is viewing your work and from where? The Author Dashboard is a personalized reporting tool that provides insight for authors into the readership of their work. Click on the Author Dashboard link in the Profile Menu to access.
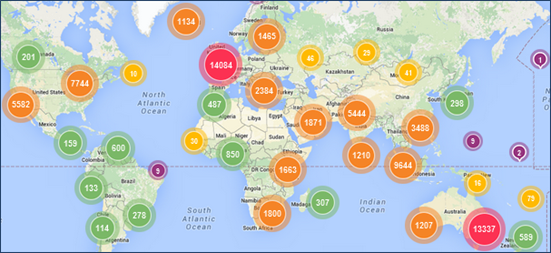
The Author Dashboard features a unique interactive Readership Distribution Map, complete with navigation controls to survey downloads in a general area or view specific readership details—including the title of the article(s) downloaded at that location and the institution, if available.
For more information about the Author Dashboard, please see our guide, Author Dashboard: Real-time Usage Statistics for Authors.
If you have any questions, please contact Consulting Services.
 Digital Commons Help Center